


Have a blessed day!


 For Fisher's card, he wanted to use a crab. (We were watching Deadliest Catch while we were discussing what to do which is what started the ocean themed cards.) He did the entire design. He even used the gypsy to get it ready to cut. He is quite determined to do it all. He only asks help in writing what he wants to say.
 Thanks for taking the time to visit. Have a blessed day.
 One of my colleagues is following the Weight Watchers diet so in support of her I made this box. I found a small snack bag of carrots and made the box a little bigger. The bunny is from Gypsy Wanderings embossed with Divine Swirls. The grass is from Create a Critter.
 I still have a few more projects to go. Saturday is the Easter Egg Hunt at church. I am making cupcakes for a snack and was going to make decor to go on top. Thanks for visiting and have a blessed day!
 On these two sides, there are more eggs. The chick and bunny are from LD Easter Beasties SVG set. The grass is from the Plantin Schoolbook cart.
  I used the cricut, MTC, Lettering Delights, a cartridge, and stickers to create the images. My SIL put it all together. I think she did a marvelous job. Here are close ups of each side.


 For this layout I used the Paper Dolls Dress Up cartridge for all of the cuts. There were several dinosaurs to choose from. Since they were accessories, they didn't have layers to them. I cut the images out in different colors and used my handy dandy scissors to trim and create the layers.
 To give the images some dimension I used my chalks to add shading and additional colors. I modeled the colors from the actual dinosaurs he is playing with. You may be able to tell on the palm tree the chalking. The others are not showing up as well in the pics.
  Thanks for visiting and have a blessed day! (My Spring Break is almost over. Just a few days left.)
 Lastly, what page would be complete without the dog from Create a Critter. (One of my favorite carts.) I added the red collar to match Patch's. The bone made a nice header for my journaling.
 Thanks for the visit. I just love company. Have a blessed day!
  As the card begins to open you can see the center section begin to swing. I wanted to put a bow on the chick's head with a little bling but restrained myself to stay gender neutral.
  Now the inside is exposed revealing a sweet sentiment also in vellum. As you can see I chose to put the bow on this side. I countered the bow with a cute little frog in the bottom right corner. It is from a micropunch from Creative Memories.
  I can see a few more of these cards in my future. It was fun to make and so many different places to be creative. Thanks for visiting and have a blessed day.
  The black card stock started at 5 1/2" by 8 1/2". The longer side was scored and folded at 3" and 1 1/4" creating a little different fold and look to the standard A2 card. The designer paper was then cut at 5 1/2" by 3" and also 5 1/2" by 1 1/4" to place on the front.
 I bundled the six cards with envelopes together using the matching ribbon and topped it with a matching monogram.

 I embossed the wings of the dragonfly and added more stickles (gotta love the shimmer). I added the bow at the very last and love the way this turned out.
 Thanks for looking and have a blessed day :)
 Here is a closer look at the girl and boy cards. By the way, the heart is a Creative Memories punch and the "Hello Friend" stamp is Studio G clear stamp.


 See the little inchie down in the bottom left corner--- love it!
 The butterflies are a Creative Memories punch. They were the last thing I added and it really made the card pop. I hope my mom realized that the heart at the top right was a magnet.
 Thanks for taking a look. Although Valentines Day has come and gone I hope this inspires you to send a note to the one(s) you love.
 These were fun and easy to make. I look forward to making more to have on hand for a variety of occasions. Have a great day and stay warm :)


For the front window I used the Paisley cartridge to cut out this embellishment; drawing the colors from the paper in the back all the way to the front. I also used stickles to add some dimension. The ribbon at the top is accented with a small button.


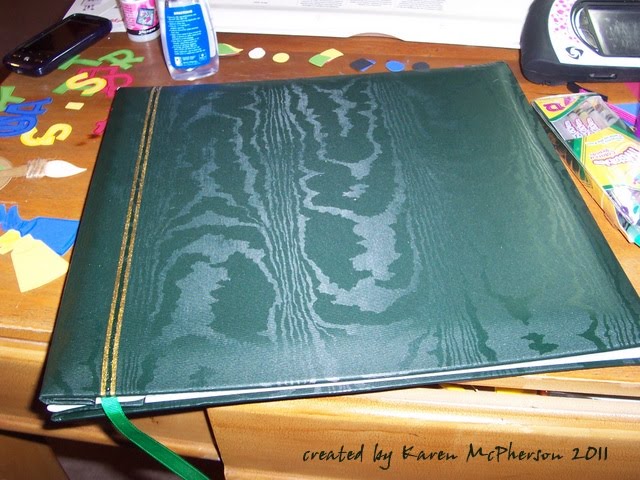 I started by gluing a ribbon over the gold stripe. I used green ribbon with yellow dots that I found in the $1 bin at Target and Zip Dry glue to adhere it to the album. The side border is cut using Plantin Schoolbook and welding (with the help of my Gypsy) two of the scalloped borders together. Next I used glue dots to place the ribbons and the colored circles on each scallop. I topped the circles with a dab of clear Stickles for a little 'bling'.
 The letters are from a new cartridge I got for Chrsitmas. It is the Cricut Lite Zoo Day. I really like the font on this. I cut the letters at 2". Using my Gypsy, I was able to align the letters of similar colors together and lay the paper out exactly where it needed to be, thus making cutting them out easy. I edged each letter with a matching colored pencil to give the letters a little more depth.
 The art supplies were cut from Locker Talk. I used the Crop-a-Dile to place the eyelet on the scissors. I also used Glossy Accents from Inkessentials to make the handles of the scissors shiny.
 Finally, what art album would be complete without crayons. I really like the way these turned out. Again, I added some stickles and outlines with colored pencil.
 Fisher is really excited about his album. Today I was able to complete the cover and make three layouts. (The snowfall that has covered the South has allowed me a few days home in order to work on this.)