I have another pictorial for you today. I altered a giant clothespin as a gift for the members of the math leadership team in my county. This year they have worked hard to provide professional development and leadership for our county. Let's get started!
The materials I used are: patterned paper, giant clothespin (found at Michael's for $1), foam brush, x-acto knife, Mod Podge, brayer, bone folder, and nail file (not shown).
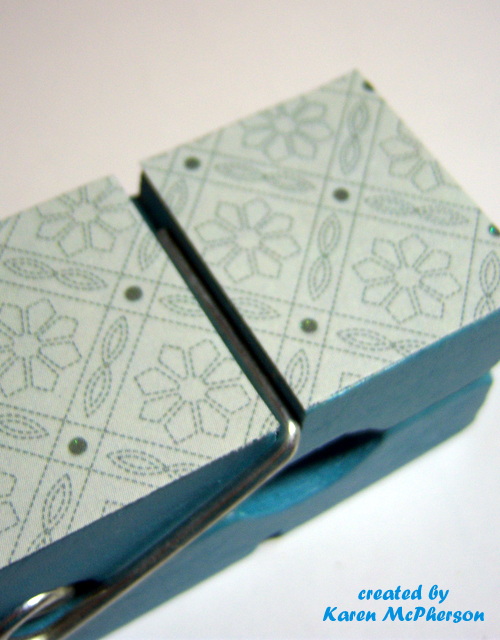
Start by cutting a rectangle large enough to cover the face of the clothespin. I placed the clothespin on the paper, traced, and cut it out. Don't worry if it is cut too big. We will trim it later. Using the bone folder, I made a crease in the paper to show where it needed to be cut to divide the paper into the upper and lower portion of the clothespin. (Wow, my bone folder looks dingy.)
I just used a pair of scissors to cut the paper. You can see in the picture below how it divides the paper into the two portions.
Next, paint a thin layer of the Mod Podge to the face of the clothespin using the foam brush.
Place the pieces of paper on the face and then use the brayer to get rid of any bubbles.
(Be careful when applying pressure to the clothespin or it may go flying across the room.)
After the Mod Podge has had time to dry trim the excess paper using the x-acto knife. (
I realized when editing the pictures that I did not stay consistent with which clothespin I was using as a model. Thus, you now see the green one instead of the blue.)
Use a nail file (or fine sand paper would) to file the edges. This made a big difference in the final project. It created a smoother transition from the paper to the painted wood. (
Do you like the file? Another $1 find at Michael's.)
Apply a layer of Mod Podge to the top to seal the paper. This should prevent fading and possible water damage. You can do 2 or 3 layers if you wanted.
(Again, I have snapped a picture of a different pattern.)
Here are all of the different patterns and clothespins. I used two paper companies: DCWV Linen Closet Stack & All Dressed Up Stack; My Mind's Eye Ooh La La Stack, Fine and Dandy Stack, and All Boy Stack. There are 14 total clothespins.
When I originally purchased the clothespins I thought they would be great for holding pictures or notes so I made a quick note to include. The apple is from Lettering Delights It Feels Like Autumn. It has a magnet on the back so the teachers can remove it and keep it. The note card was designed in the Silhouette Studio and cut out with the Cameo. I used an EK Success puch for the paper edge and a Studio G stamp for the thanks!
Here are the final products. I really had fun making these and they were pretty easy to do. I'll give them out tomorrow at our monthly meeting.
Thanks for visiting and I hope this inspires you to alter something. I would love to hear about your projects.
Have a blessed day!